To replace a roof vent, remove the surrounding shingles, pull the old nails, lift the failed vent, clean the deck, seal a matching new vent in place, tuck flashing under upper shingles, nail at the corners, and reseal. Cost in Maryland ranges from $150 to $750.
A failing roof vent can leak quietly for months before you see ceiling damage. Knowing how to replace a roof vent correctly protects your attic, your insulation, and your roof warranty. This guide walks Maryland homeowners through every step.
Why Roof Vents Fail
A roof vent lets hot, moist attic air escape. When it fails, water gets in, and shingles overheat from below.
Most vent failures in Maryland come from four causes:
- Cracked rubber boots. UV exposure splits the rubber collar after 10 to 15 years.
- Storm and wind damage. Maryland summer storms lift box vents and bend turbines.
- Rusted metal flashing. Older galvanized flashings corrode and allow water intrusion.
- Poor original installation. Too few nails or a thin sealant ets the vent come loose.
Check the attic on a sunny day. Daylight around the vent or damp insulation means it has failed.
Types of Roof Vents
Match the replacement to the exact vent you have. The five common types are not interchangeable.
- Box vents (turtle vents). Square, low-profile passive vents. The easiest to replace.
- Ridge vents. Continuous vents along the roof peak under cap shingles.
- Turbine vents. Wind-powered spinning vents that must be balanced.
- Power vents. Motorized fans wired to 110V or solar power.
- Plumbing vent boots. Rubber collars around plumbing pipes. These fail most often.
How to Replace a Roof Vent: 8 Steps
This is the same process used by licensed Maryland roofers on a standard asphalt shingle roof. The example covers box vents and plumbing vent boots.
Step 1: Pick a Safe Day
Never work on shingles when they are wet, hot, or icy. Cool, dry mornings in spring and fall are ideal.
Wear soft-soled shoes and use a tied-off ladder. On any roof steeper than 6/12, use a roof harness anchored to a ridge anchor.
Step 2: Gather Tools and Materials
- A replacement vent that matches the existing size and type
- Flat pry bar and hammer
- 1¼-inch galvanized roofing nails
- Roofing sealant or polyurethane caulk (not silicone)
- Utility knife with a hook blade and a caulking gun
- Replacement shingles in case any tear during removal are needed
Step 3: Loosen the Shingles
Use the pry bar to lift the shingles above and beside the old vent. Work slowly so the asphalt does not crack.
Find the row of nails holding the top half of the vent flashing under the shingle course above.
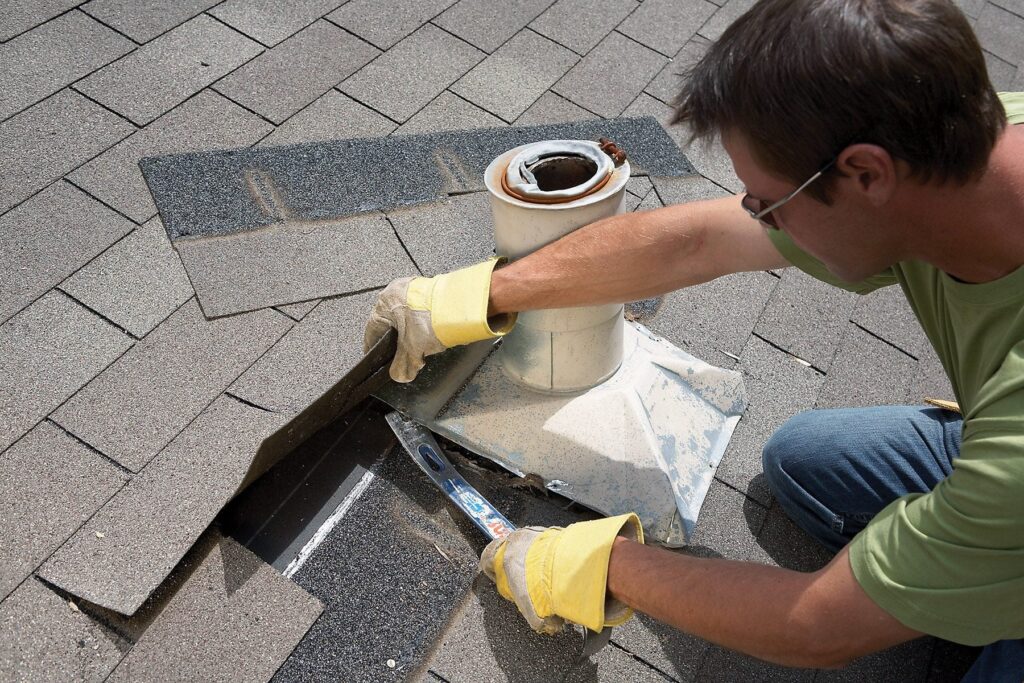
Step 4: Remove the Old Vent
Pull the nails. The vent should lift straight up off the roof opening.
Inspect the deck. If you find soft or rotted plywood, stop. This is now a decking repair and needs a professional.
Step 5: Clean and Prep the Opening
Scrape off old sealant, debris, and nail fragments. Wipe the deck clean.
The new flashing must sit flat against the deck. Any bumps or debris will cause leaks.
Step 6: Set the New Vent
Run a continuous bead of roofing sealant under the new vent’s flange. Place the vent over the opening.
The top edge of the flashing must tuck under the upper shingles. The bottom edge must sit on top of the lower shingles.
This shingle-over, flashing-under sequence is how a roof sheds water. Reversing it causes immediate leaks.
Step 7: Nail and Seal
Drive roofing nails through the flashing at the four corners. Set them flush, not below the surface.
Cover each nail head with sealant. Press the lifted shingles back down and reseal any cracked asphalt.
Step 8: Inspect From Below
Go into the attic with a flashlight. Look for daylight around the new vent. There should be none.
Run a hose over the area for five minutes. Check the underside of the deck for moisture before you finish.
How to Replace a Camper or RV Roof Vent Cover
Camper roofs use the same waterproofing principle as a house roof. The materials differ.
Most campers have a 14-inch by 14-inch standard vent opening on an EPDM or TPO rubber roof membrane.
Step-by-Step:
- Park on level ground and access the roof using the reinforced walkway.
- Remove the screws holding the vent cover flange to the roof.
- Break the old butyl tape with a plastic putty knife. Metal scrapers will gouge the membrane.
- Lift the old vent loose. Clean off all old sealant.
- Lay new butyl tape around the opening. Set the new vent and screw it down.
- Cover the entire flange with self-leveling lap sealant (Dicor 501LSW or equivalent).
To replace just the plastic lid that flips open, the job is simpler. Most lids have four screws on the hinge bar and can be swapped out in 15 minutes.
Cost to Replace a Roof Vent in Maryland (2026)
Roof vent replacement costs vary by vent type, roof pitch, and hidden deck damage.
Average Costs:
- Plumbing vent boot: $150 to $400
- Box or turtle vent: $150 to $500
- Turbine vent: $200 to $600
- Ridge vent: $8 to $15 per linear foot, or $350 to $750 per run
- Power or solar vent: $300 to $1,400, plus electrical work if needed
What Drives the Price Up
- Steep roof pitch. Anything over 6/12 needs harnesses and more time.
- Hidden deck damage. Rotted plywood adds $200 to $600 in repairs.
- Roofing material. Slate, tile, and standing-seam metal cost more than asphalt.
Most Maryland roofers charge a $200–$300 minimum trip fee. Bundling vent replacement with other small repairs often saves money.
When to Call a Licensed Maryland Roofer
DIY is reasonable on a low-pitch ranch in good weather. It is not reasonable in these situations:
- Roof pitch is 7/12 or steeper
- The roof is more than one story high
- You found rot, mold, or soft decking under the old vent
- The vent is a ridge, power, or solar unit
- Your roof is slate, tile, cedar shake, or metal
- Your roof is under a manufacturer’s warranty
- The damage came from a storm, and you may file an insurance claim
Storm damage matters. A documented professional inspection in Maryland often pays for itself by establishing the cause of damage before you file with your insurer.
How Often Should Roof Vents and Flat Roofs Be Replaced?
Most Maryland homeowners replace roof vents at the same time they replace the roof itself. Asphalt shingle roofs in Maryland last 20 to 25 years on average.
If only one vent is failing, replace that vent alone. If multiple vents show wear, the full roof is likely near the end of its life.
Flat Roof Replacement Timelines
Flat roofs are common on Maryland row homes and DC townhouses. Their lifespans vary by membrane type:
- TPO: 20 to 25 years
- EPDM (rubber): 20 to 30 years
- Modified bitumen: 15 to 20 years
If you are weighing a flat roof replacement, address vents and drains in the same project. It saves on labor and mobilization costs.
Why Trust Bright View Exteriors
Bright View Exteriors is a licensed roofing and exterior contractor headquartered at 11720 Beltsville Drive, Suite 1030, in Beltsville, Maryland.
The company serves homeowners across Maryland, Northern Virginia, and Pennsylvania. It is licensed under MHIC #148746, fully insured, and rated 5 stars by local homeowners on Google.
What Sets the Team Apart:
- Free, no-pressure inspections. Technicians photograph the vent, flashing, and decking, then explain exactly what is needed.
- Insurance claim representation. Staff document storm damage and coordinate directly with insurance adjusters.
- GAF and CertainTeed certified installation. Vent flashing is installed to the manufacturer’s spec, which preserves your roof warranty.
- Beltsville-based crews. Local installers who know Maryland weather, code requirements, and common roof styles.
Conclusion
Knowing how to replace a roof vent is a practical skill, but it is not always the right choice. Low-pitch asphalt roofs in dry weather are reasonable DIY projects.
Steep roofs, hidden rot, ridge vents, and storm-damaged systems belong with a licensed Maryland roofer. The right move is knowing which category your roof falls into before you climb the ladder.
If you would like a second opinion before starting, Bright View Exteriors offers free roof vent inspections across Beltsville, Silver Spring, Potomac, and the wider DMV area.
Stay updated on our services and special offers. Connect with us on Facebook, Instagram, and Google My Business.
Contact us today to schedule your inspection or get a free quote.
Frequently Asked Questions
How long does it take to replace a roof vent?
A standard box vent or plumbing boot replacement takes 30 to 60 minutes for a professional. DIY usually takes 2 to 3 hours, including setup and cleanup.
Can I replace a roof vent myself?
Yes, on a low-pitch asphalt shingle roof with no hidden damage. Anything steeper than 6/12, multi-story, or on slate, tile, or metal should go to a licensed roofer.
How much does it cost to replace a roof vent in Maryland?
Most roof vent replacements in Maryland cost $150 to $750 in 2026. Plumbing vent boots are the cheapest. Power and solar vents are the most expensive.
What is the best sealant for a roof vent?
Use polyurethane roofing sealant or a quality roofing tar. Avoid pure silicone, which does not bond well to asphalt shingles and breaks down faster in UV.
How do I know if my roof vent is leaking?
Look for water stains on attic rafters, damp insulation, daylight around the vent flashing, or ceiling stains directly below the vent location.